There is a way by which you can install Windows 10 on M1 Macs. Today, we are going to show you how to install Windows 10 on M1 Macs. The methods are pretty simple and anyone can easily do it.
Install Windows 10 on M1 Macs Using Parallels Desktop
Setting Up Your Mac
Now that Boot Camp is gone, you can’t run Windows 10 natively on a Mac. So you will need a virtual machine to run Windows 10 on a Mac device. The best software to do that is Parallels Desktop. It is a virtualization engine that can run ARM-based operating systems in a virtual machine. First of all, download and install Parallels Desktop on your M1 mac device from this link.
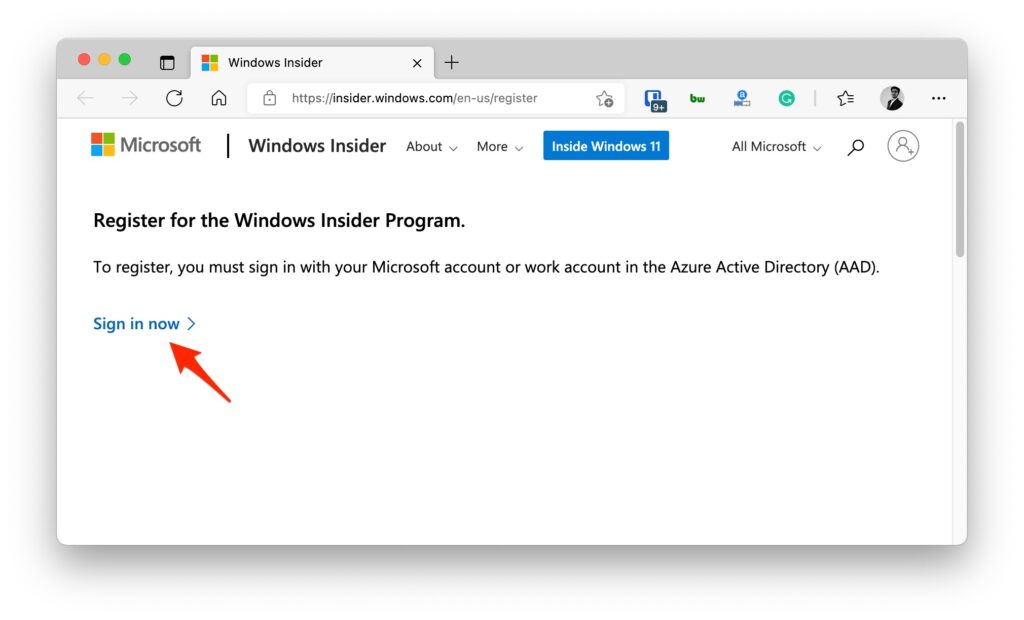
Registering for Windows Insider Program
In order to run Windows 10 using Parallels Desktop, you will need the ARM-based installation image of Windows 10. You can get the ARM image of Windows 10 by registering for Windows Insider Program. It is absolutely free of cost! Click on this link to get started. Note: It is not mandatory to Register for Windows Insiser Program, but if you do register for it, you will get future updates too.
Downloading the Windows 10 ARM-Based Image
Once you have successfully registered to the Windows Insider Program, visit the Windows Insider Preview Downloads web page.Navigate down and download the Windows 10 ARM Image by clicking on the Windows 10 Client ARM64 Insider Preview button. This will download the VDHX Image.
Installing Windows 10 on M1 Mac
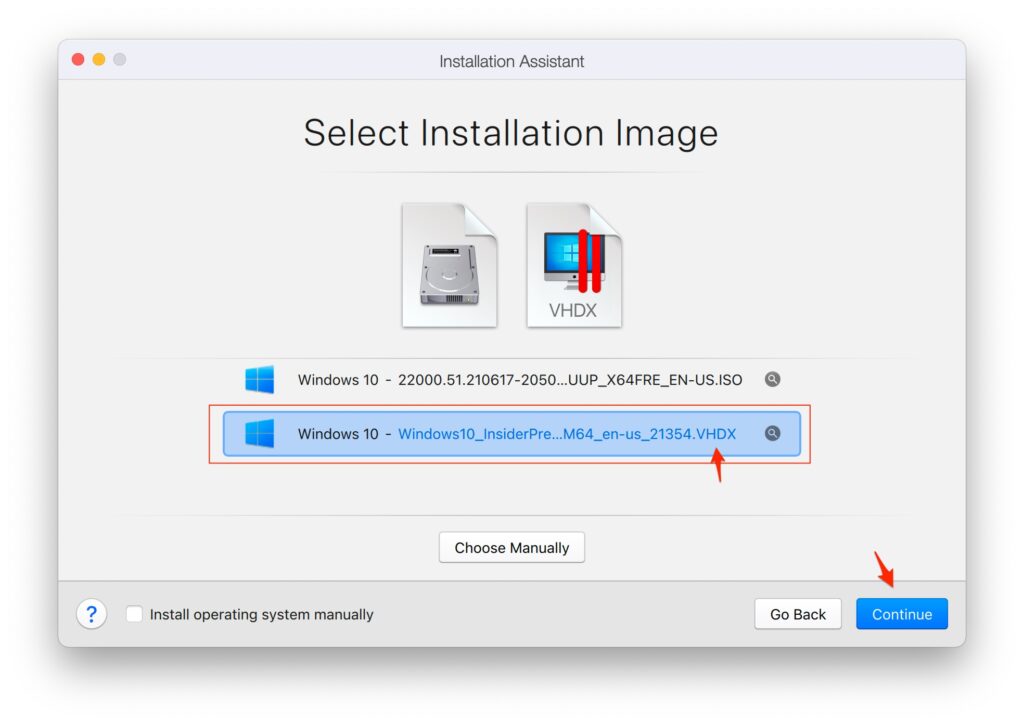
Once you have successfully downloaded the Windows 10 VDHX image, launch Parallels Desktop on your Mac.Click on ‘Continue’.
You will now see the ‘Create New’ menu. Here click on ‘Install Windows or another OS from a DVD or image file’.
Now Parallels Desktop will automatically search for the downloaded Windows 10 VDHX file.
After that, Parallels Desktop will create a virtual machine for you. Now, this might take some time. So be patient.Now you will see the Configuration window where you can allocate the memory, number of processors, etc.You can click on the ‘Hardware’ tab to assign the memory depending on your requirements. We suggest you allocate half of the resources of the configuration of your mac to the virtual machine.
or you can select the auto setup option, by unchecking the manual configuration option, and let Parallel do the needful.
Once you have set all the configurations, click on ‘Continue’ to complete the installation on Windows 10.
Complete the installation.
Setting Up
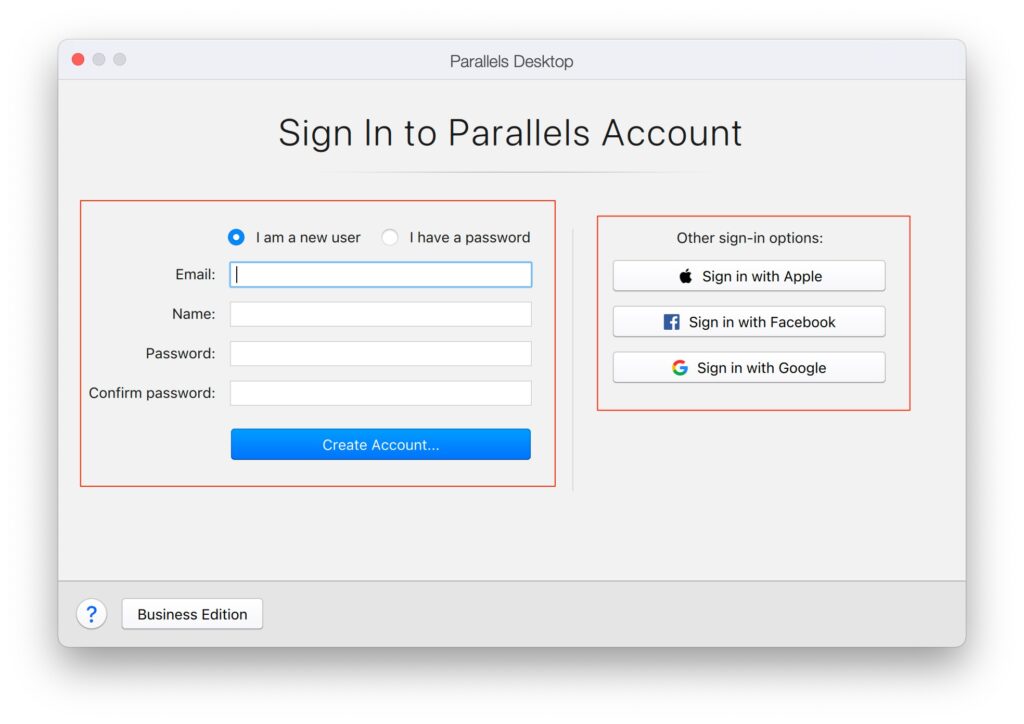
Once the installation is complete, you will be asked to log in with your Parallels account. You can create an account if you haven’t already. Once you do that, you will be able to run Windows 10 on your Mac. You can update Windows 10 to get everything you need. After that, you can download all of your favorite apps and games.
Install Windows 10 on M1 Macs Using UTM
Installing UTM on Your Mac
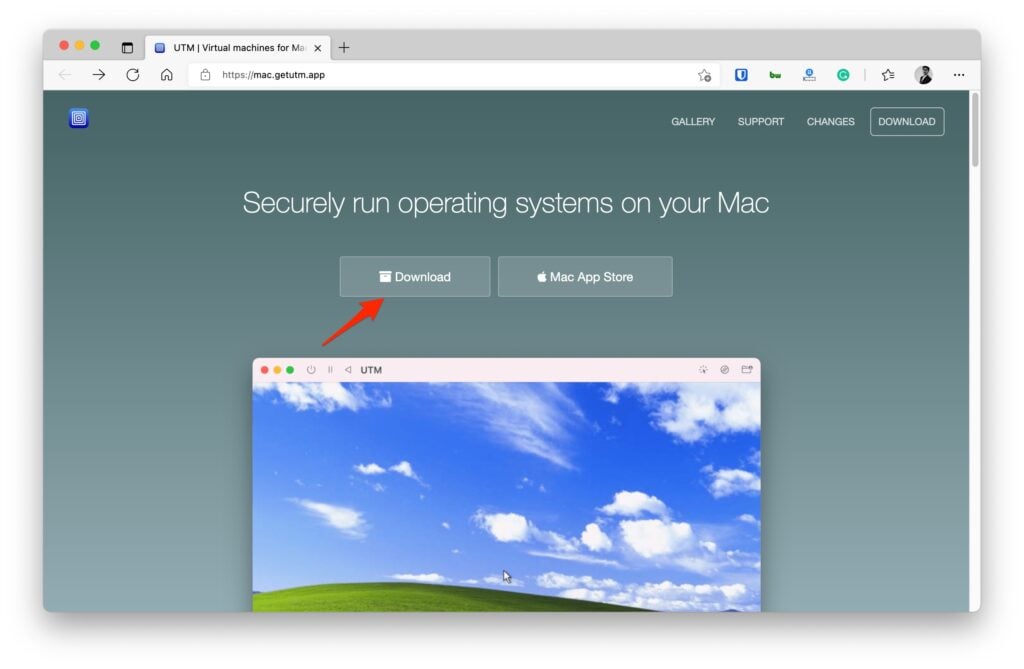
Using UTM you can create a Windows 10 virtual machine that can be used to run Windows 10 on your M1 Mac. To do that, you need to install UTM on your Mac. You can simply download and install UTM from the Apple Store or you can also download UTM from the official website. Note: We will suggest you to donwload from official website only, as you can download dmg file from official site for free, whereas you will have to pay $9.99 in App Store.
Setting Up Your Mac
Once you have installed UTM on your Mac, launch the application. You will the interface with three options: Create a New Virtual Machine, Browse UTM Gallery, and User Guide. Here click on Browse UTM Gallery and you will see a web page with links to download pages for a number of virtual machines. Here click on Windows 10. Remember, you will need the Windows Insider membership in order to download the Windows 10 ARM-based image. You will see a web page with details about what is needed: an Apple Silicon Mac, UTM for Mac, Windows for ARM, and SPICE Guest Tools. Make sure to download all the files before you go on to create a virtual machine. In this case, you will be required to download Windows for ARM and SPICE Guest Tools.
Creating a Virtual Machine
Step 1: Once you have downloaded all the required files. Open UTM and click on Create a New Virtual Machine. Step 2: Here give the Name and Style to your new VM. Step 3: Now go to the ‘System’ tab and select ARM64 (aarch64) as the architecture. Step 4: Assign at least half of your Mac’s memory to the virtual machine. Step 5: Click on the ‘Drives’ tab. Here click on the ‘Import Drive’ option. Step 6: Select the Windows 10 VDHX file that you have downloaded. Step 7: Select NVMe interface for the drive. Step 8: Now click on the ‘New Drive’ option and select ‘USB’ interface. Then click on ‘Create’. Step 9: Now you will see Windows Disk Image and the virtual USB CD/DVD Drive are listed on the Drives tab. Click on Save. Step 10: You will now see Windows 10 Virtual Machine on the left side menu of UTM. Click on the Windows 10 Virtual Machine. Step 11: On the right side, you will see CD/DVD column as ‘(empty)’. Click on the bottom arrow to open the drop-down menu. Step 12: Click on ‘Browse’. Select the SPICE Guest Tools ISO file that you downloaded. Open it and it will be available to the Virtual Machine. Step 13: Once you have done this, click on the big black play button on the right-side menu. Step 14: Now this will start Windows 10 installation. Complete the installation and then you are good to use Windows 10 on your M1 Mac.
Finishing the Setup Process
Once that your Windows 10 virtual machine is running on your M1 Mac, Open the file explorer. Now go to the CD Drive(D:). Click on the SPICE Guest Tools application. Grant all the permissions and this will install all the drivers on your Windows 10 Virtual Machine. That’s it and now you can enjoy Windows 10 to the fullest on your M1 Mac.
Closing Phrase – Install Windows 10 on M1 Mac
So that was all about how to install Windows 10 on M1 Macs. You can do it and enjoy Windows 10 even better on the fast M1 Macs. In case of any difficulty, feel free to reach out to us. Also, Read: WWDC 2021: macOS Monterey, iOS 15, iPadOS